Showing posts with label patterns. Show all posts

Saturday, June 10, 2017

another ear warmer pattern

As I was dabbling around with ear warmers recently, I put together another pattern, this one loosely based on the fingerless glove pattern that I make most of the time. To be honest, I'm not sure how thrilled I am with the pattern as it now stands, but it's a start, and sometimes a start is good enough. Like now, for instance.

Cable Ear Warmers
Size G Hook

Chain 34

Sc in 3rd ch from hook and to end, 32 st

Round 1-Ch 2, Hdc in same st, 30 dc in next 30 loops of chain, hdc in next free loop, *sc in  end of row, ch 13, sc in 3rd ch from hook and next 10 ch sc in same stitch as was done here * Hdc in next sc,  dc in next 2dc. * Fptrc in next 2 dc, dc in next 3 dc's. Rep from * 5 times. 30 sc's. Sc in end of row, ch 13, sc in 3rd ch from hook and next 10 ch, sl st in same st as this * End row.

Round 2- Ch 2, *dc in next 3 st. Sk next st, fptrc in next fptrc below, go back and fptrc in skipped stitch, first "x" made.  Rep from *  5 times, dc in next 3dc. Sc in next 11 free loops of ch, sc in end and in next 11 sc's, sl st in next sc.

Round 3- ch 2, dc in next 2st, *fptrc in next 2 st, 3 dc in next 3 st, rep from * 5 times, sc in next 11 free loops of ch, sc in end and in next 11 sc's, sl st.

Round 4- ch 2, *dc in next 3 st, fptrc in next 2 st rep from * 5 times. Dc in next 3dc, sc in next 11 st, 2 sc in next st, sc in next sc, 2 sc in next sc, sc in next 9 sc, sl st.

Round 5-ch 2, dc in next 2st. *Sk next st, fptrc in next fptrc below, go back and fptrc in skipped stitch, first "x" made.  Dc in next 3 st Rep from *  5 times. sc in next 11 st, 2 sc in next st, sc in next sc, 2 sc in next sc, sc in next 9 sc, sl st

Round 6. Sc around.

Round 7- ch 2, sc's in same st and in next 106 sc's. Ch 4, turn, sc in next 2 sc's, turn back to front side and 4 sc's into loop just made, sc in next 11 st, sl st to beginning, finish off.


Sunday, May 28, 2017

Toy hammock net

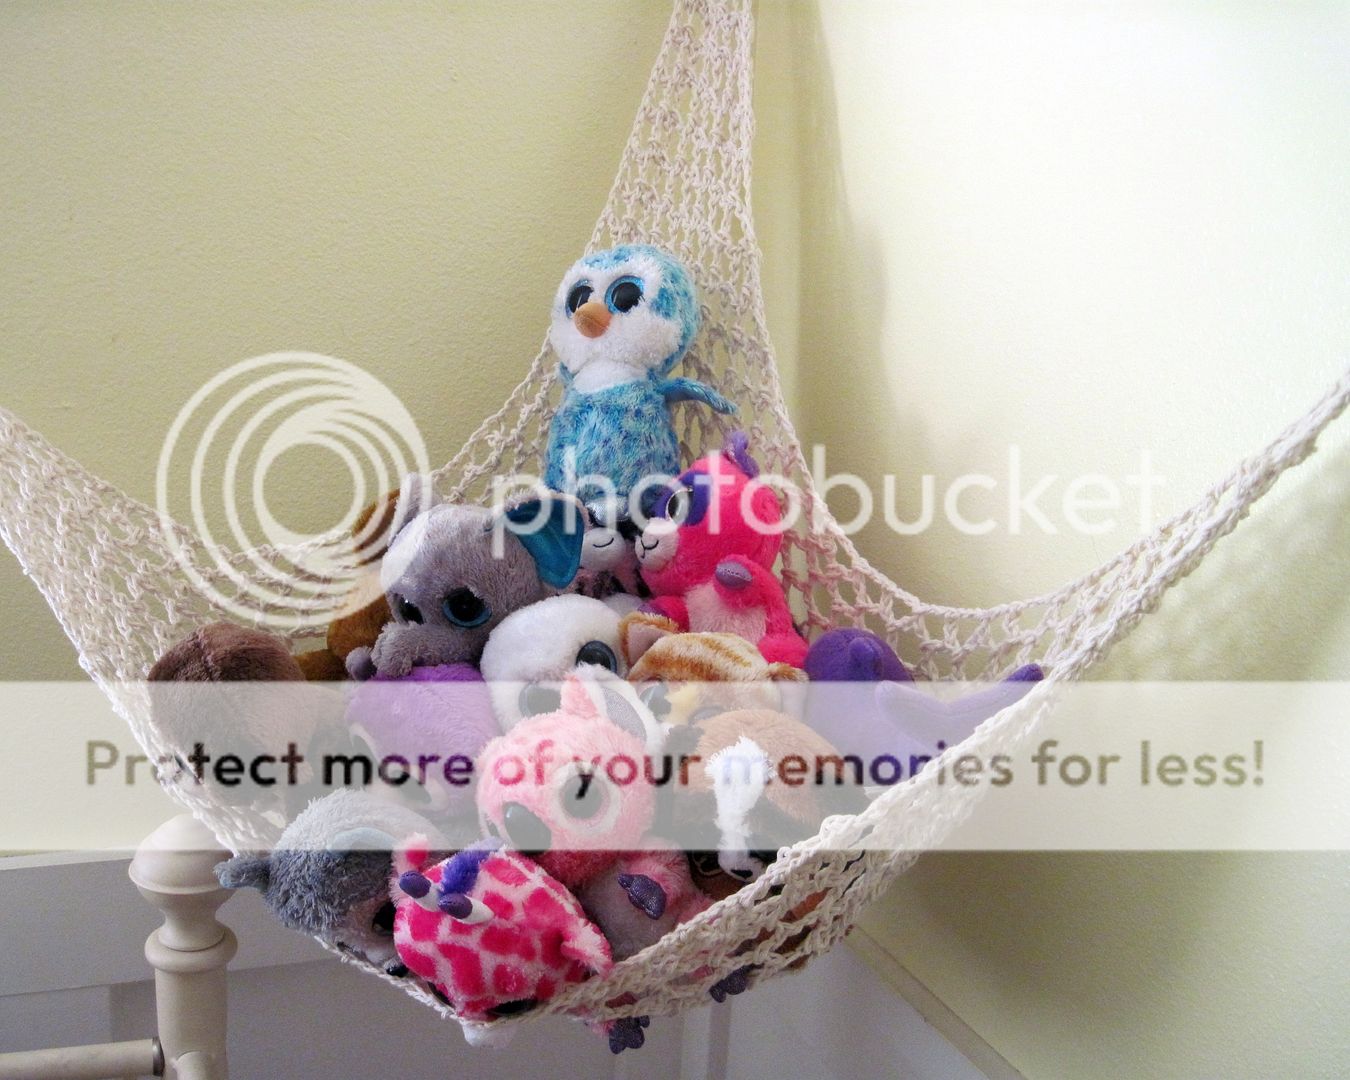
My kid has a plethora of stuffed animals. Like, that's her thing, and we have about a million of them in our small home.

One day, I decided that I needed to do something about them all, and I put together a toy hammock for them.

It turned out well, looked pretty, and keeps our home a little less cluttered. Win!

Here are some (typically rough) instructions that I used

Toy Hammock Net

Cotton yarn
Size I hook

Ch 6, sl at to make a loop. Ch 125, then ch 6 again, and make another sl st loop as at the beginning.

Ch 4, sk 2 ch below, dc in next ch, ch 2, sk 2 ch below, dc in next ch. continue across.

Ch 4, sk next loop, dc in next loop. Ch 2, dc in next loop. Continue across. Repeat this row to end of hammock. (Pattern automatically decreases by one in each row). 

Make another ch 6 sl st loop, finish off.
 photo IMG_5690.jpg
Don't be fooled. This is only about 1/4 of the number of stuffed animals that reside in our home.

 photo IMG_5688.jpg

Sunday, April 10, 2016

Ear Warmer Pattern

 photo IMG_4507.jpg


I've dabbled a bit here and there with ear-warmers, but up till now, had never worked up a pattern that really felt right. But, a month or two ago, I started working with a pattern in the round, with varying stitches, and it finally felt good enough to pursue.

 photo IMG_4503.jpg

So, here it is, in all it's "Charlotte-ese" crochet language glory. I call it the . . .

Crossing Lines Ear Warmer Pattern
(!!!! Catchy eh? I'm just full of unique titles over here)

 photo IMG_4505.jpg


Size G Hook

Chain 34

Sc in 3rd ch from hook and to end, 32 st

Round 1-Ch 2, Hdc in same st, make 15 dc "X"s in next 30 loops of chain, hdc in next free loop, *sc in  end of row, ch 13, sc in 3rd ch from hook and next 10 ch sc in same stitch as was done here * Hdc in next sc, make 15 doc "X"s in next 30 sc's. Hdc in next sc, *sc in next st. Ch 13, sc in 3rd ch from hook and next 10 st, sl st in same st as this * End row.

Round 2- Ch 2, Hdc in same st, Hdc in each st across to "tail" (32 st). Sc in next 11 free loops of ch, sc in end and in next 11 sc's, sl st in next sc.

Round 3- ch 2, Hdc in same st, Hdc in each st across to "tail" (33 st). Sc in next 11 free loops of ch, sc in end of row and in next 11 sc, sl st to beginning.

Round 4- Ch 2, Hdc in same st and in next 2 sc's. Make 13 dc "X's" in next 26 st, Hdc in next 15 sc's, 2 Hdc in next sc, 1 Hdc in next, 2 Hdc in next, Hdc in next 15 sc's, make 13 dc "X's" in next 26 sc's, Hdc in next 14 sc's, 2 Hdc in next sc, 1 Hdc in next 2 Hdc in next. Hdc in next 9 sc's, sl st to end.

Round 5- Ch 2 Hdc in same st and next 33 st, *sc in next 11 Hdc, 2 sc in next st, sc in each of next 2 sc, 2 sc in next st,*  sc in next 11 st  Hdc in next 34 sc's rep from * to * sc in next 8 st, sl st to beginning.

Round 6- ch 2, sc's in same st and in next 110 sc's. Ch 4, turn, sc in next 2 sc's, turn back to front side and 4 sc's into loop just made, sc in next 11 st, sl st to beginning, finish off.

FLOWER
Ch 4, join in a circle, ch 4, sl st in circle made, repeat 5 times, six "petal frames" made

Sc, hdc, dc, hdc sc in first "petal frame", repeat in next 5 frames, sl st to first frame

Sl st around post between frames, ch 4. Repeat from beginning 5 times, sl st around first post

Sc in first ch 4 sp, dc 4 times, sc. Repeat in next 4 ch spaces, sl st to beginning, finish off

 photo IMG_4512.jpg

Friday, November 6, 2015

Pieced Hexagon Stocking--quick and semi-cryptic instructions (more for my own records than anything)

A bit ago, I had a customer purchase a listing I have in my etsy shop, one for the Custom-Made Granny Square stocking. She had purchased stockings for her family elsewhere at some time in the past, but now had a new member of the family, wanted a stocking to match, and found that her previous source for stockings had ceased operations. So, she gave me her color choices, and a picture of one of the stockings she had already purchased and asked if I could make something similar.

The stockings she needed to match were a little different in style than the ones I had made previously, and so I agreed to try my hand at imitating the style of what she needed. After a bit of trial and error, I managed to get something pretty close, and since she was pleased with the result, and since I didn't want to have to "re-invent the wheel", should I want to make that kind of stocking again, I've decided that I should take a minute and write down what I did. So, here it is:

 photo IMG_0980.jpg


Pieced Hexagon Stocking

Hexagon- make 15

 photo square.jpg

Magic circle
Then do 12 hdc in center
then 24 hdc in next row
then 36 hdc in next row
then 48 hdc in last row, finish off

Square- make 1
Magic circle
Then do 8 hdc in center
then 16 hdc in next row
then 24 hdc in next row
then 32 hdc in next row, finish off

Here's where it gets cryptic--In my opinion, the very best way to lay out these squares is according to this pattern at holidayimaginations.etsy.com. But, it wouldn't be fair or ethical for me to copy those layout instructions here on my own blog now, would it? So, I'm just going to refer you to that pattern for the layout instructions. The pattern is only $4.75, and it's easy to follow, and in my opinion, well-worth the purchase price.

Following the layout in the holiday imaginations pattern, crochet sides together with wrong sides facing and with single crochet, thus making a ridge along the joining.

Beginning at back top of stocking, hdc around top one time. Join and chain 10, joining to make a loop for hanging.

Weave in ends.


Pin It

Sunday, March 1, 2015

swimming turtles

So, almost a year ago, one of my brothers announced that they were expecting their fourth child. A few months later, they announced that this child would be a boy. A few weeks after that, I went on a pinterest hunt, looking for a crochet baby blanket that would be just the right spot of adorable-ness for this new nephew-to-be. As I was searching along, I found a picture of a darling ripple afghan, worked in shades of blue with just a bit of tan and white, which then had five crochet turtles sewn to the blanket, as if they were headed out to the sea.

Just the right spot of adorableness.  

I went to the site (sewloca.com), where Cristina broke down her process of designing, and then making the afghan. She included a link to a free ripple afghan pattern, and described how she worked the ripples, then added some bobbles in the white to make the "foamy" look. Entranced and encouraged, I decided to try my own luck at making a swimming turtle blanket.

 photo IMG_9539.jpg


 photo IMG_9538.jpg

It turned out well. So well in fact, that I decided to make another one, and this time write out the pattern as I went so that I didn't have to rely on other sites for my own future reference. Turtle blanket  #1 was sent to the new babe, and I started work on turtle blanket #2.

I decided to make the foamy part of the sea a little bit thicker, this time around, and I added an extra turtle.
salu 1-15 photo IMG_0712_1.jpg

Also, it was winter by the time I finished this one, so the grass background looks much worse for the wear than in the photos of blanket #1.

salu 1-15 photo IMG_0708_1.jpg


salu1-15a photo IMG_0711_1.jpg

salu 1-15a photo IMG_0709_1.jpg


salu 1-15a photo IMG_0713_1.jpg

After I'd finished making the blanket and writing up the pattern, I decided that just for easy reference, I'd post my version of the pattern here. I do sell a few patterns in my etsy shop, but since I got the idea and the building blocks of this blanket entirely from from the goodness of some other people's hearts, it feels right to keep this pattern here, where anyone who wants to access it can do so for free.

So, here it is:

SWIMMING TURTLES PATTERN
(inspired by Cristina at sewloca.com)

Yarn-5 skeins of worsted weight yarn, one in each of the following colors: Dark Blue, Medium Blue, Light Blue, White, and Tan. Also some yarn in differing shades of green, brown, tan, etc, for the turtles. (I used Caron Simply Soft for all aspects of this project)

Crochet Hook-Size G (This is what works for me. You might want to use a size H hook here, I crochet more loosely than just about anyone I know)

Pattern:

BLANKET
Starting with the darkest blue, chain 171 across

R1: Dc in 4th ch from hook, *dc in next 4 st, dec 2 times, dc in next 4 st, 2 dc in each of next 2 st * repeat from * to * across, ending with 2 dc in last st.

Follow this pattern for 16 rows, then switch to medium blue for 16 rows, then to light blue for 16 rows.

Switch to white, follow pattern for 3 rows. On the 4th row, working in back loops only, make a cluster stitch every other stitch or so (this makes the "foam" of your ocean), switch to tan/creme at end of row.

Using tan/creme, working in free loops of the white row, continue the pattern. Once you get to row 2 of the tan, use both loops, and continue until you have made 16 rows. Fasten off.

salu 1-15 photo IMG_0719_1.jpg

salu 1-15 photo IMG_0720_1.jpg

salu 1-15 photo IMG_0717_1.jpg


salu 1-15 photo IMG_0716_1.jpg


TURTLES
Make 6 (or five, if you prefer)

SHELL
RND 1: Starting with Green (or whatever color you want the head and legs and tail to be), chain 3(counts as first hdc), then hdc in beg chain, *ch 2, 2 hdc in beg ch* 4 times. Join, switching to brown You should have five ch 2 spaces.

RND 2: in any ch 2 space, ch 3, 2 dc in same space, *ch 2, 3 dc in next sp*,  four times. Join, fasten off.

Rnd 3: With green, ch 2 in middle st of any 3dc cluster, *sc in next st, sc, dc in stitch below, sc in next ch 2 space, sc in each of next three dc* repeat around row, chain 2

Rnd 4: Working in front loops only, sc around, decreasing every five stitches or so. Finish off.


FRONT LEGS AND HEAD

LEG: Using the picture as a guide, and working in the unused back loops of Rnd 3, sl stitch in the stitch where you want the front right leg to be. Ch 5, then turn and, working in back loops, sc, hdc, dc, hdc, sc in next five stitches. sl stitch to Rnd three, and sc to where you want the head to be.

HEAD: sl st where you want the head to be, then chain 4. Working in back loops of ch, hdc four times in next sc, sc in each of next three ch. sl stitch, and sc to where you want the other leg to be. Repeat process for leg, finish off.

BACK LEGS AND TAIL

LEG:  Using the picture as a guide, and working in the unused back loops of Rnd 3, sl stitch in the stitch where you want the back left leg to be. Ch 4, sc in back loops of sc, sc in unused loops of rnd 3. until you get to where you want the tail. Make tail by sl st, ch 2, sl st in same stitch. Sc in unused loops of Rnd 3 until you get to where you want the other leg to be, repeat process for leg, finish off.

Weave in ends, stitch turtles to blanket.


Pin It

Thursday, March 6, 2014

my go-to dishcloth pattern

Sometimes I like to get fancy with my dishcloths, but when I'm looking for basic, this is the pattern to which I turn.

Photo & Video Sharing by SmugMug

Photo & Video Sharing by SmugMug

Photo & Video Sharing by SmugMug

Photo & Video Sharing by SmugMug

Crochet Hook Size G

Chain 21

Row 1: Hdc in 3rd ch from hook and all across. Ch 2, turn.
Row 2: Hdc in each hdc across.
Repeat Row 2 eleven times, until you have 13 rows total. Finish off.

Go around your square one or two times with sc, shooting for 18sc on each side, with 3 scs in each corner.


Pin It

Monday, November 18, 2013

new dishcloth set

Photo & Video Sharing by SmugMug

I made a new set of dishcloths, using my pattern of choice, which just happens to be the pattern that is on the back of the label for the Peaches & Creme yarn balls or cones.  Basically, you chain 21, and then half-double crochet for fourteen rows (putting eighteen stitches per row). After you've done that, you do two rounds of single crochet around for a border. The first border should have 21 stitches per side, with three stitches in each of the corners.

It's a handy pattern. I've made a few others of my own, and I like those as well, but I always come back to this one. Maybe I'm just a basic kind of girl? Who knows?

Anyway, I'm calling this set "Black Hills", because the colors kind of remind me of what I've seen around the Mount Rushmore area.

Photo & Video Sharing by SmugMug


Pin It

Wednesday, April 3, 2013

another hat pattern


Newsboy Cap--newborn size

Crochet Hook: G

Rnd 1:  Do Magic Circle, add 4 sc in ring
Rnd 2:  Chain 2, make 9 double crochet in the ring, slip stitch to join. (10  stitches, chain 2 counts as one.)
Rnd 3:  Chain 2 and turn, make 2 double crochet in each stitch across the round, slip stitch to join. (20  stitches).
Rnd 4:  Chain 2 and turn, make 2 double crochet in each stitch across the round, slip stitch to join. (40 stitches).
Rnd 5: Chain 2 and turn, double crochet in each stitch across the round, slip stitch to join.
Rnd 6-9:  Repeat row 5 for 4 rows. 
Rnd 10:  Single crochet in each stitch across the round, slip stitch to join.  Fasten off. 

BRIM
Row 1: Join yarn in the 11th stitch past the fasten off stitch. Single crochet in the next 18 stitches.
Row 2-3:  Chain 1 and turn, single crochet across the row two times.
Row 4-6: Chain 1 and turn, skip the 1st stitch, single crochet across the row, skipping the 2nd last stitch, single crochet in the last stitch.  Repeat from * for 2 more rows and fasten off.  

For buttoned strap:

Chain 21, work treble crochet in 3rd ch from hook and in each ch across, ch 3 and slip stitch to original chain.  Use two buttons and sew buttons and strap above the brim of the cap.


Pin It

Tuesday, May 8, 2012

Newsboy Cap Pattern


This is my go-to newsboy cap pattern.  Giving credit where it is (absolutely) due, I based it on this City Girl Cap pattern by Celeste Young.  I found that for me, the brim on the original was a little too long, and there were a few issues with the crown that I didn't love, so I made a few adjustments to make it more for my liking.  Here it is:


Newsboy Cap
(Based on a Design by Celeste Young of warmweatherknitting.blogspot.com)

Size G hook

Brim
(make 2):
Row 1: Ch 31, turn. Sc in second ch from hook and in each ch across (30 sc).

Row 2: Ch 2, turn (counts as first hdc in this row only). Skipping first sc, hdc in each sc across and in beg ch 1 (30 hdc).

Row 3: Ch 2, turn. Skipping first hdc, sc decrease over next two hdc. Hdc in next 25 hdc, sc decrease over next st and second ch of beg ch 2.

Row 4: Ch 2, turn. Skipping first hdc, sc decrease over next two hdc. Hdc in next 23 hdc, sc decrease over next st and second ch of beg ch 2.

Crown:

Ch 4. Join with sl st in first ch to form ring.

Rnd 1: Ch 3 (counts as first dc), 23 dc in ring (24 dc). Join with sl st to top of beg ch 3.

Rnd 2: Ch 3(counts as last BPDC now and throughout), FPDC in next dc, (2 BPDC in next dc, FPDC in next DC) around, BPDC around beg ch 3. Join with sl st to top of beg ch 3 (12 FPDC, 24 BPDC made).

Rnd 3: Ch 3, (2 FPDC around first FPDC, BPDC around each of next two BPDC) around. Join with sl st to top of beg ch 3.

Rnd 4: Ch 3, (FPDC around each of next two FPDC, 2 BPDC around next BPDC, BPDC around next BPDC) around. Join with sl st to top of beg ch 3.

Rnd 5: Ch 3, (FPDC around each of next two FPDC, BPDC around next three BPDC) around. Join with sl st to top of beg ch 3.

Rnd 6: Ch 3, (FPDC around each of next two FPDC, 2 BPDC around next BPDC, BPDC around each of next two BPDC) around. Join with sl st to top of beg ch 3.

Rnd 7: Ch 3, (FPDC around each of next two FPDC, BPDC around each of next four BPDC) around. Join with sl st to top of beg ch 3.

Rnds 8-15: Rep rnd 7.

Rnd 16: Ch 1, sc in same st as joining. Sc in each dc around, decreasing every four sc's

Rnd 17: Rep rnd 16. 

Rnd 18: Rep rnd 17, but decrease every 10 sc's instead of every 4 sc's

Rnd 19: Rep rnd 18, but decrease every 20 sc's instead of every 10 sc's

Rnd 20: Ch 1, sc in same st as joining and in next few sc. Place visor pieces together with WS facing and edges evenly held together (pin if needed) against front of hat. Insert hook into first bottom loops of each visor piece, then into next sc from rnd 18. YO and draw a loop up and through these three layers, yo and draw through two loops on hook (sc). Sc in same way across remaining sc of bottom of visor to connect it to cap. Sc in next sts around; join with sl st in beg sc.

Rnd 21: Ch 1, sc in same st as joining and next few sc. Sc along edge of visor to corner, and then sc across sts of front of brim, more sc along other edge of visor. Sc in remaining sc around. Join with sl st in beg sc, fasten off.


Pin It

Saturday, April 14, 2012

as promised--Sunhat Pattern


Here's the pattern I've put together for the crochet sunhat that I've been working on lately.  Again, my jumping off point was this pattern over at lionbrand.com.  I changed some of the numbers as far as hat band motifs, single crochets, and brim rows to make the hat the size and fit that I wanted.  Also, I added a wire along the brim.  


ADULT SIZE

Photobucket

MATERIALS:  10 oz worsted weight cotton yarn, size G crochet hook, blunt needle

HAT BAND:
Motif (make 9): 
Ch 4, join with sl st into ring. Work 8 sc into ring, sl st to join. Next rnd: Ch 3, yo and insert hook into same space, yo, pull loop through, yo, pull through 1 loop, yo, pull through 2 loops, yo, pull through rem 2 loops (first petal made). *Ch 3, yo and insert hook into next sc, pull loop through, yo, pull through 1 loop, yo, pull through 2 loops (2 loops rem on hook), yo and insert into same sc, pull loop through, yo, pull through 1 loop, yo, pull through 2 loop, yo pull through rem 3 loops on hook (petal made); rep from * 6 more times -- 8 petals made counting First Petal. Ch 3 and join with sl st top top of first petal. Fasten off.

Assemble Hat Band: Sew motifs together so that there is one ch-3 space free at top and bottom of each motif. Join 9 motifs into long narrow hat band.

HAT:Make magic circle, work 6 sc into ring, sl st to join. Mark beg of rnd, working in a spiral:
Rnd 1: 2 sc in each sc around -- 12 sc.
Rnd 2: *2 sc into next sc, sc into next sc*, rep from * to * around -- 18 sc.
Rnd 3: *2 sc into next sc, sc into next 2 sc*, rep from * to * around -- 24 sc.
Rnd 4: *2 sc into next sc, sc into next 3 sc*, rep from * to * around -- 30 sc.
Rnd 5: *2 sc into next sc, sc into next 4 sc*, rep from * to * around -- 36 sc.
Rnd 6: *2 sc into next sc, sc into next 5 sc*, rep from * to * around -- 42 sc.
Rnd 7: *2 sc into next sc, sc into next 6 sc*, rep from * to * around -- 48 sc.
Rnd 8: *2 sc into next sc, sc into next 7 sc*, rep from * to * around -- 54 sc.
Rnd 9: *2 sc into next sc, sc into next 8 sc*, rep from * to * around -- 60 sc.
Rnd 10: *2 sc into next sc, sc into next 9 sc*, rep from * to * around -- 66 sc.
Rnd 11: *2 sc into next sc, sc into next 10 sc*, rep from * to * around -- 72 sc. 
Rnd 12:  *2 sc into next sc, sc into next 11 sc*, rep from * to * around--78 sc.
Rnd 13:  Work one rnd even in sc, except, increase one sc three times in approximately even places.--81 sc.  
Rnd 14-15:  Work 2 rnds even in sc.  

Join Hat and Hat band: Rnd 1: With right sides tog, sc 81 sts around inserting hook through both hand band and last row of hat to join (each hat band motif will have 9 sc across, 2 sc into ch-3 space, 1 sc into top cluster st, 3 sc into middle free ch-3 space, 1 sc into next top cluster st, 2 sc into ch-3 space). Sl st back seam of hat band and with RS facing, work 81 sc around bottom of hat band (9 sts across each motif as described above). Work 4 rnds even in sc.

Brim Incs:
First Rnd: *Sc into each of next 9 sts, 2 sc into next st*, rep from * to * around -- 89 sts. Work 1 rnd even in sc.
Next Rnd: *Sc into each of next 10 sts, 2 sc into next st*, rep from * to * around -- 97 sts. Work 1 rnd even in sc.
Next Rnd: 
*Sc into each of next 11 sts, 2 sc into next st*, rep from * to * around -- 105 sts. Work 1 rnd even in sc
, working wire in underneath the sc's. 


Embellishments:  Make Crochet Ribbon by making a tight chain, as long as you want.  Thread through first row of brim, tying in a bow.   If you want to add flowers, make them and sew them on to the hat wherever you want, being sure NOT to sew into your ribbon (so that your ribbon can be adjustable).





CHILD/PRE-TEEN SIZE

Photobucket


MATERIALS:  10 oz worsted weight cotton yarn, size F crochet hook, blunt needle

HAT BAND:
Motif (make 8): 
Ch 4, join with sl st into ring. Work 8 sc into ring, sl st to join. Next rnd: Ch 3, yo and insert hook into same space, yo, pull loop through, yo, pull through 1 loop, yo, pull through 2 loops, yo, pull through rem 2 loops (first petal made). *Ch 3, yo and insert hook into next sc, pull loop through, yo, pull through 1 loop, yo, pull through 2 loops (2 loops rem on hook), yo and insert into same sc, pull loop through, yo, pull through 1 loop, yo, pull through 2 loop, yo pull through rem 3 loops on hook (petal made); rep from * 6 more times -- 8 petals made counting First Petal. Ch 3 and join with sl st top top of first petal. Fasten off.

Assemble Hat Band: Sew motifs together so that there is one ch-3 space free at top and bottom of each motif. Join 9 motifs into long narrow hat band.

HAT:Make magic circle, work 6 sc into ring, sl st to join. Mark beg of rnd, working in a spiral:
Rnd 1: 2 sc in each sc around -- 12 sc.
Rnd 2: *2 sc into next sc, sc into next sc*, rep from * to * around -- 18 sc.
Rnd 3: *2 sc into next sc, sc into next 2 sc*, rep from * to * around -- 24 sc.
Rnd 4: *2 sc into next sc, sc into next 3 sc*, rep from * to * around -- 30 sc.
Rnd 5: *2 sc into next sc, sc into next 4 sc*, rep from * to * around -- 36 sc.
Rnd 6: *2 sc into next sc, sc into next 5 sc*, rep from * to * around -- 42 sc.
Rnd 7: *2 sc into next sc, sc into next 6 sc*, rep from * to * around -- 48 sc.
Rnd 8: *2 sc into next sc, sc into next 7 sc*, rep from * to * around -- 54 sc.
Rnd 9: *2 sc into next sc, sc into next 8 sc*, rep from * to * around -- 60 sc.
Rnd 10: *2 sc into next sc, sc into next 9 sc*, rep from * to * around -- 66 sc.
Rnd 11: *2 sc into next sc, sc into next 10 sc*, rep from * to * around -- 72 sc. 

Rnd 12-15:  Work 4 rnds even in sc

Join Hat and Hat band: Rnd 1: With right sides tog, sc 72 sts around inserting hook through both hand band and last row of hat to join (each hat band motif will have 9 sc across, 2 sc into ch-3 space, 1 sc into top cluster st, 3 sc into middle free ch-3 space, 1 sc into next top cluster st, 2 sc into ch-3 space). Sl st back seam of hat band and with RS facing, work 72 sc around bottom of hat band (9 sts across each motif as described above). Work 4 rnds even in sc.

Brim Incs:
First Rnd: *Sc into each of next 8 sts, 2 sc into next st*, rep from * to * around -- 80 sts. Work 1 rnd even in sc.
Next rnd: *Sc into each of next 9 sts, 2 sc into next st*, rep from * to * around -- 88 sts. Work 1 rnd even in sc.
Next Rnd: *Sc into each of next 10 sts, 2 sc into next st*, rep from * to * around -- 96 sts. Work 1 rnd even in sc
, working wire in underneath the sc's.  
Embellishments:  Make Crochet Ribbon by making a tight chain, as long as you want.  Thread through first row of brim, tying in a bow.   If you want to add flowers, make them and sew them on to the hat wherever you want, being sure NOT to sew into your ribbon (so that your ribbon can be adjustable).


Pin It

Monday, February 13, 2012

Bulky Cowl Pattern

This is a pattern that I've recently been working on.  I quite like it.  It's inspired by  this pattern, but I've made some changes that work better for me.


Photobucket


Bulky Cowl

Use two strands of yarn together.  
Size N hook

Row 1:  Chain 22, do treble in 4th chain from hook, and in each chain to end.  Chain 3, turn.
Row 2:  Work Back Post Treble in each treble to end, chain 3, turn.
Row 3:  Work Front Post Treble in each treble to end, chain 3, turn.  


Repeat Rows 2 and 3 until there are 24 rows total, or until the rectangle you are making is approximately 22 inches long.  Slip stitch ends together, twisting one side over first.  


Pin It

Tuesday, February 7, 2012

Convertible Cowl Pattern

salu 2-12


Here's the pattern (written in Charlotte-ese again) for a convertible cowl that I like to make.

Crochet Convertible Cowl

Materials:

220 yards of worsted weight yarn (I like Patons SWS wool/soy blend, but I think they've discontinued it.  Boo!)

J Size Hook


Chain 61 and join with a sl st into back of chain (do not twist chain).  (OR, alternately, you can go ahead and work row one into the chain, and then join, being sure to slip stitch the bottom together.  This way helps me to be certain that I'm not twisting the chain.)

Row 1: Chain 2, (working in back of chain) Sc in same chain as joining. Sc in each chain around and join to first stitch.


* * * You should have 61 stitches on each row that you complete* * *

Row 2: Ch 3, (counts as first dc), skip st and dc in each Sc around. Join with sl st to top of first stitch.

Row 3:  Repeat Row 2

Row 4: Ch 2, (counts as first hdc), skip st and hdc in each around. Join with sl st to top of first stitch.

Row 5: Ch 3, (counts as first dc), skip st and dc in each hdc around. Join with sl st to top first stitch.

Rows 6-7: Repeat Row 5

Row 8: Repeat Row 4

Row 9: Repeat Row 5

Row 10: Ch 2, Sc in each dc around. Join with sl st to first stitch.

Rows 11-18 Repeat Rows 3-9

Rows 19-24 Repeats Rows 3-7

Fasten off.


Dimensions = 10” wide (laid flat) and 13” high (laid flat)


Pin It