Saturday, December 28, 2013

Ipad sleeve pattern (off-the-cuff)

After having it on my WIP list for over a year, I finally made myself a sleeve for my iPad.

Photo & Video Sharing by SmugMug

I love it.

I love it so much that I thought I'd write down my pattern here. It's not one of my "this has been checked and double-checked and is written in standardized terms" patterns, it's more of a "smidgen of this and a smidgen of that" kind of pattern. But, it's straightforward enough that it will hopefully be of help to the blog-reading masses.

I used wool blend yarn for this project (the brown I reclaimed from a thrift-store sweater a few years back, the green my mom snagged for me at a total liquidation sale awhile back), and I think when I make more (my brother-in-law wants one for his chromebook and my husband wants one for his nook), I will do the same again. I like the feel of the yarn, and the wool blend gives it a little extra water-resistance over cotton, and a little more durability (in my opinion) than acrylic.

Photo & Video Sharing by SmugMug

Size G Crochet hook

Chain 50

Sc in each ch, form a ring and join.

Do 10 rows of contrasting color, then 4 rows of main color, then 3 of contrasting,then 1 of main, then 1 of contrasting, then 24 of main( or however are needed to finish ).

Sew up the seam.

Sew a button on the front, and then starting around the middle of the sleeve, make a chain slip stitch "rope" (i.e.--chain however many chains you want--probably 10-20, and then slip stitch in each chain to give it more substance). Make sure it fits the button well, and slip stitch it (in a few places--for a more sturdy join) in place.

Photo & Video Sharing by SmugMug

Weave in ends. 

Tuesday, December 3, 2013

another newsboy

It's been awhile since I've done a newsboy cap. Fortunately, a customer contacted me through etsy and requested that I make her one in hues of brown (she already had one in blues).

I'm pleased with how this one turned out.

Photo & Video Sharing by SmugMug

So pleased, that I made one for myself as well.

Photo & Video Sharing by SmugMug


Pin It

Wednesday, November 27, 2013

Sashay

A bit ago, a young neighbor of mine (who knows that I crochet) pointed to a beautiful frilly crochet scarf that another of our neighbors was wearing, and asked if I could teach her how to make one. 

I didn't know, but I figured I could probably find out, and so I asked her for a bit of reconnaissance time. After a google search or two, I found what I was looking for at good old redheart.com

Specifically, I found this pattern. The yarn needed is called Red Heart Sashay, and it's more ribbon than yarn, which accounts for the frills all through the scarf.

And then, I worked up this scarf:
Photo & Video Sharing by SmugMug


Would you believe that this whole scarf is made up of a foundation chain row, followed by row after row of 4 single crochet stitches? Getting my fingers used to working with the ribbon yarn has been kind of tricky, but not unenjoyable.


Regardless of all of this, the scarf is frilly, fun, and I love the texture of it. I can see me making more like them in the future.  

(And I recently taught my young neighbor as well.)


Pin It

Monday, November 18, 2013

new dishcloth set

Photo & Video Sharing by SmugMug

I made a new set of dishcloths, using my pattern of choice, which just happens to be the pattern that is on the back of the label for the Peaches & Creme yarn balls or cones.  Basically, you chain 21, and then half-double crochet for fourteen rows (putting eighteen stitches per row). After you've done that, you do two rounds of single crochet around for a border. The first border should have 21 stitches per side, with three stitches in each of the corners.

It's a handy pattern. I've made a few others of my own, and I like those as well, but I always come back to this one. Maybe I'm just a basic kind of girl? Who knows?

Anyway, I'm calling this set "Black Hills", because the colors kind of remind me of what I've seen around the Mount Rushmore area.

Photo & Video Sharing by SmugMug


Pin It

Tuesday, November 12, 2013

a ridiculously easy, but not always obvious, solution for the problem of lost scissors

Do you have a hard time keeping track of your scissors when you are crocheting? I used to spend about half my crocheting time looking for my scissors! (or at least, it felt that way). Either I was sitting on them, or my skein of yarn had rolled onto them, or I had placed them to the right of me, but was looking to the left . . . you get the idea, and you know the story, right?

Well, one day, about fifteen years ago, I chanced to be a Thanksgiving Dinner, and I saw one of my cousins working on some needlework in the corner. There, around her neck was a long chain with a pair of scissors safety-pinned to it. Brilliant!  Whenever she needed a little snip, there it was, she just snipped away, no looking for scissors or anything.

I've never lost my scissors since.

I don't generally use a chain per se (I'm not all that fancy), but I've used dollar-store mardi gras beads, as well as a "necklace" I made by crocheting a chain with three strands of yarn at once. Right now my holder of choice is a lanyard tag that I got at a convention I attended a few years back. Works like a charm.


Photo & Video Sharing by SmugMug


So there you are, a helpful hint for the day.


Pin It

Sunday, October 27, 2013

It's always nice to get a little outside validation, you know?

A friend of mine just texted me this (names have been changed for the sake of privacy on this big ole world wide web of ours):

So, John had the girls over at the park and Bella was in her knit dress. John said he overheard a group of moms talking about how much they loved her dress and trying to get one of them to ask him where it came from. I guess they didn't dare, but it was a hit.

How cool is that?

Wanna see the "knit" (actually crochet) dress that Bella was wearing, that I made, that was such a hit?

Well no, maybe you don't really care. But, I'm totally stoked about the whole thing, so I'm gonna show you.

Photo & Video Sharing by SmugMug

Photo & Video Sharing by SmugMug

Photo & Video Sharing by SmugMug
Dress Twins

It's just so fun when your work is appreciated, you know? As is always the case with this dress, special thanks to Janelle at PontePretties for the pattern.


Pin It

Wednesday, October 9, 2013

Gnome Stocking Cap - a tutorial just for you!

My mom started teaching me to crochet (at my request) when I was ten years old. We worked on a poncho together, and due to my inexperience as well as my waxing and waning interest at the time, that poncho took me four years to complete. Then, in high school, my crochet projects consisted of a series of afghans which I would do, essentially by looking up a stitch in my mom's copy of Reader's Digest Complete Guide to Needlework and then making an afghan using nothing but that stitch. Kind of boring, but man, did I learn a bunch of different stitches that way!

By the time I got to college, I was interspersing my blanket-making with hats. Specifically, a stocking cap that I essentially designed in my head, playing it by ear (or feel as the case may be), doing what seemed right and hoping it would turn out to my liking. I would make them and give them to roommates, friends, guys I wanted to date, charitable organizations, you name it. I'm more of a beanie and newsboy crocheter now (as evidenced by what I stock in my etsy shop), but for several years there, this cap was my piece de resistance, the lead number in my repertoire, the Ace in my deck.

It looks a little something like this:

Photo & Video Sharing by SmugMug

So, I find it fitting that for my first tutorial ever, I'm going to teach you how to make your own version of this versatile little number.

For those of you who like a road-map here and there, here's how the hat breaks down:  You start with a chain that will eventually make up the bottom brim of the hat. After a foundation row, you begin a pattern that you will continue throughout the rest of the hat. This pattern is simple--one round of double crochet stitches followed by one round of single crochet stitches, repeated for the entire hat. As you decide to taper the hat, you decrease the stitches either gradually (if you want a nice long hat, as I show here) or quickly (if you want one that is shorter in size).

Easy enough, right? Okay, lets get started:


I used scrap yarn for this particular project. I was going for a rainbow-ish look, so I went through my bag of scraps, and chose about ten different colors.

Photo & Video Sharing by SmugMug


For hook size, I chose size "I" hook, because I want it to work up quickly, and I don't care about having super-tight, super-warm stitches for this project. If I was making this for a really super cold winter, say the kind you get in parts of Canada or Montana or what-have-you, I would probably use a size G or H, and I probably would do this hat in all single crochet rather than alternating with the double crochet. But, I'm making it for myself, and although it does get quite cold here in the winters, it's not a humid cold, or generally an icy wind that blows right through me and makes me miserable. So, I'm good with stitches that are a little bit bigger.

Photo & Video Sharing by SmugMug


To start, make a loose chain that will go around the circumference your head, loosely. You don't want it too tight, because this is the foundation of your whole hat, and if it's too tight it will either 1)give you a headache every time you wear it, or 2)be so small that you won't be able to put it on.

Personally, I made my chain, then wrapped it around my head, not stretching it at all, made sure I had a little extra (probably a centimeter or two), and called it good. For my head and my particular crochet tension (which tends to be on the loose side), that was 60 chains.

Now, most patterns will then tell you to join the chain together to make a circle, being careful not to twist the chain, because if you do twist the chain, you'll end up with a mobius kind of thing going on which, while a great little trick to know if you are making an infinity scarf, won't be all that helpful in the making of our hat now, will it? If you have success with this way of starting, feel free to skip this next part and join us again right below this next picture, but if not, read on.

Personally, I've had enough experience with thinking I had not twisted the chain, and then finding out four rows later that I had twisted the chain, and because of that I now have to undo my four rows of mobius-ness and start all over again;  that I do things a bit differently here.  Rather than joining the chain together right after I finish making it, I treat it like a row, (rather than a round) and I chain one, and then do a row of single crochets in my chain.  Then, when I have those lovely single crochets all lined up and I can see with ease that nothing is twisted and everything is fine, then I join my ends together to make a circle.

Doing it this way gives me a little gap where my chains should have come together (see below), but that doesn't worry me, because I'll take care of that problem when I weave in my ends later.

Photo & Video Sharing by SmugMug

Now that you've made the chain that is the circumference of your head, done a row of single crochets to go on it, and joined your yarn into a circle, it's time to really get going on this hat. Chain two, and do a round of double crochets in the single crochets. Join, and chain one.  Follow that row with a row of single crochets, join, and chain two. (Remember how I said the whole hat was a combination of double crochets followed by single crochets? You've just completed your first section of that pattern.)

Do it all again, starting with the first row of double crochets. At this point, you should have 5 rows--a single crochet row, followed by a double crochet row, followed by a single crochet row, followed by another double crochet row, and followed up by another single crochet row.

If you are following the same general color pattern I am (that of thinner standard colored stripes between thicker varied color stripes), then it is now time to switch colors from one of your varied colors to your standard "tie everything together" color. Do this, and continue with the one row double crochet/one row single crochet pattern that we've established.

Photo & Video Sharing by SmugMug

This time, instead of going through the pattern twice, you'll only go through it once, and then it's time to change to another of your varied colors. Continue with the pattern. You may notice in my picture below that my purple stripe is made up of only one double crochet/single crochet combination. That's because I didn't have a whole lot of purple scrap yarn, and what I had ran out before I was able to complete the second set of double and single crochet rows. If I were doing this in a perfect world though, I would have gone ahead and completed another row of purple, making my purple row twice as long as my creme rows are. Ah well, bygones.

Photo & Video Sharing by SmugMug

Continue with your pattern until you get to your eleventh time around - which should be the single crochet round of your fifth double crochet/single crochet combo. When you get to this row, go around with your single crochet, except make one decrease every fifteen or so stitches. Do the same thing when you get to the next single crochet row, and the next single crochet row (don't decrease on any of the double crochet rows however).

The next time you get to the single crochet row, decrease every twelve stitches instead of every fifteen. Repeat this two more times, on the next two single crochet rows.  Your hat will start to taper at the top as you continue to decrease your stitches.

Photo & Video Sharing by SmugMug

Continue with this pattern, moving your decreases to every ten stitches on rows 23 and 25.  At this point, you're kind of going to start playing it by ear with your decreases. Your priority now is to have at least two decreases in every single crochet round, rather than decreasing at a set number of stitches. So, when you get down to eighteen stitches in a round, you'll want to decrease every nine stitches, or maybe one decrease at stitch ten and another one at stitch sixteen or something. It doesn't need to be all that precise, just try to make sure that you you get two in, and that you aren't always decreasing in exactly the same spot.


Photo & Video Sharing by SmugMug
If you look really closely at that large creme patch towards the top of the hat, you'll see that it's actually a thick pale yellow stripe surrounded on either side by a thin creme stripe. Just in case you found this troublesome, I thought I'd better point it out.


Continue on decreasing on the single crochet rows. Eventually you'll end up with fewer and fewer stitches to work with.

Photo & Video Sharing by SmugMug


Your work space will probably get so tight that you'll need to leave the ends from your changing colors sticking out on the outside of your hat. Don't worry about that, we'll fix it later.

Photo & Video Sharing by SmugMug


When you run out of stitches to put stitches in (follow that?) you're done.

Voila!

Photo & Video Sharing by SmugMug


Weave in your ends. You can do this any number of ways, but I personally prefer to use a tapestry needle.

Photo & Video Sharing by SmugMug


Oh, and remember that hanging thread and gap from where your chain didn't get joined in the beginning?  Go ahead and stitch that together as part of your "end weaving". No one will ever notice.

See?  Be honest, if I hadn't pointed it out to you, would you have had any idea that there had been a gap there? I thought not.

Photo & Video Sharing by SmugMug


And now, you now have a stellar hat to wear or give! You can take it out for a day in the snow (my personal favorite), or wear it to keep warm as you go about your winter errands, or put it on at the end of the day when you want to relax in jammies and slippers - just because it's comfy and looks so very very stylish. The choice is completely yours.


And as a bonus? You now also have the tools to change this basic pattern up to make any number of variations. Want a hat that's even longer? Try decreasing every twenty stitches or only every other single crochet row. Want your hat to be shorter? Decrease every five stiches. Want it all one color but the brim and the top? Only switch colors at the bottom and the top. Want a tassel or pom pom? Make one up and stitch it to the end. Need a bit more brim? You can either add a couple of rows at the bottom, or you can make up some ribbing (I like the directions here), and stitch it to the bottom of your hat. You get the idea.

Above all, enjoy your new hat 'cuz really, what's not to enjoy here?

Photo & Video Sharing by SmugMug

I can't think of a single thing. 


Monday, August 19, 2013

Crochet Flower Cleansing Cloths

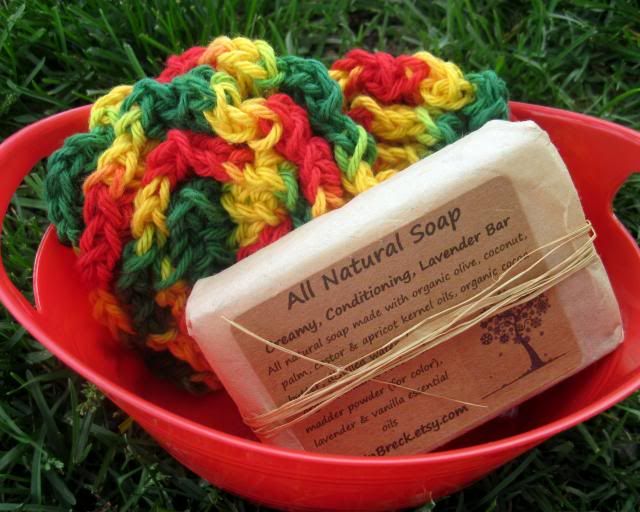
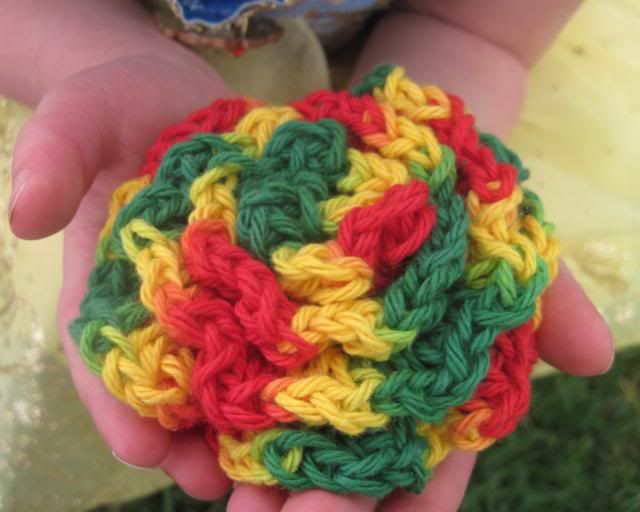
Several months ago, I found myself presented with a few graduation announcements for some dear girls (yes, I realize that we are now in the season for school starting, not ending. What can I say? I'm behind with blogging), and I determined that the perfect gift for them would be some handmade soap, paired with a few hand-crocheted cotton washcloths.  Only, I wanted something cuter than the cloths that I generally make.

 photo IMG_3789.jpg

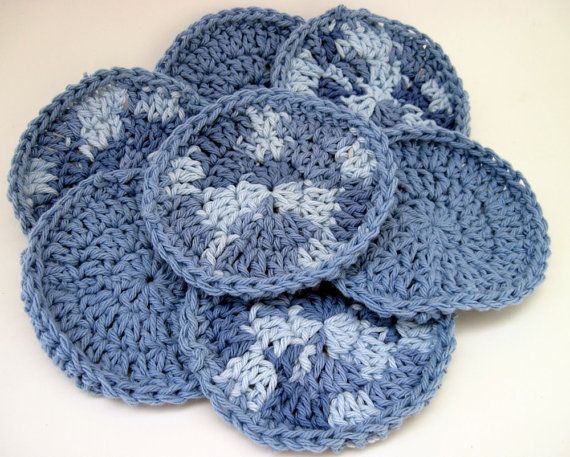
Enter Kara's Crochet Flower Cleansing Pads. I found this pattern through a google image search, and boy, and I ever grateful! The flowers worked up quickly, and they turned out darling. Once I get caught up on all my other projects, I hope to make several more in different colors.
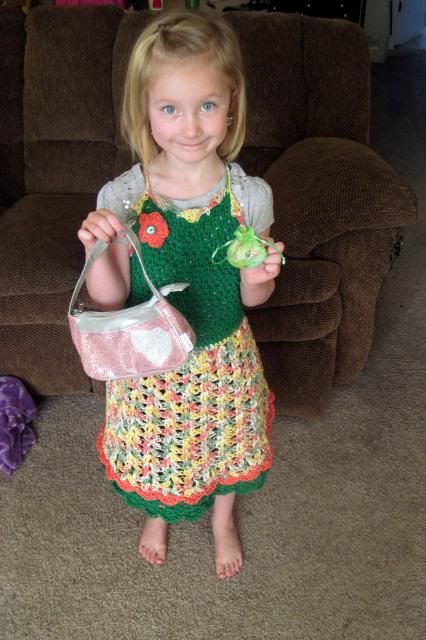


 photo IMG_3787.jpg

I love making something that is pretty to look at and functional. Don't you?

 photo IMG_3785.jpg


Pin It

Wednesday, August 7, 2013

Works in Process-August Edition

Active Projects (work on one or more of these every day or close to that)
  • Beard Beanie Work
  • Dishcloths for the Bear Lake Cabin (not mine--just to be clear), Make some for Kate, just as long as I'm at it.
  • Finish Halter Top Dresses, make one for Abby as well
 photo IMG_3254.jpg
  • Restock Fingerless Gloves, maybe make some in a soft wool.
 photo IMG_1876.jpg
  • Make Halter Top Dresses either for gifts or for sale  
Back Burner, but still on the stove
  • Afghan for Bear Lake Cabin--once colors are chosen
  • Ipad sleeve
  • Make scripture carrier for my daughter
  • Make market bag
  • Make 5 Baby Girl Dresses (or sweaters) for future gifts
 photo slippers.jpg
  • restock dishcloth sets, also try at least one new pattern


  • Make more scrubbies-restock and also try a new patternPhotobucket
  • Go through old stock, either donate or re-purpose items that are consistent non-sellers
  • Crochet legwarmers
  • Christmas presents for those people that I can't put here on the internet.
  • Secret present for Eric (c.p.)
  • Several camo hats to go with picture that Harmony took, list in shop.

  • Restock Chunky Beige Scarf
  • Restock Lacey Scarf
  • Restock/add to newsboy cap stock 

  • Make a scarf/cowl like the one Tonia asked about.
  • Work on (finish?) garden of pink baby blanket, write up pattern.
  • Make a hairband something along the lines of this.
  • Dodger hat for Doug (?)
  • Make tassel hat in toddler size (and colors), list in etsy shop


Someday, (I hope!)
  • Reclaim yarn from thrift store sweaters
  • Make/Design Beret
  • New Winter Cap for me, using that big button and 3 already made flowers.
  • Design/Make Potholders (for wedding gifts)
  • Design/experiment with long stocking caps (Robert)
  • Afghan for M.E.C.
  • Make/Design Soap Socks for family, gifts, possibly etsy shop.(popcorn stitch on one side, plain on the other.
  • Re-learn to tat.
Image courtesy of vrangtantebrun

  • Use up scrap yarn--new living room afghan?  Grandma Long Afghan?
  • Make those dishtowels that hang from the stove
  • Make/Design leg warmers for H and other girls?
  • Make/Design/Refine Convertible Mittens pattern
  • Go through specialty yarn, imaginate (scarves?)
  • Make infant hats with interchangeable buttons to give as shower and general new baby gifts.  


Pin It