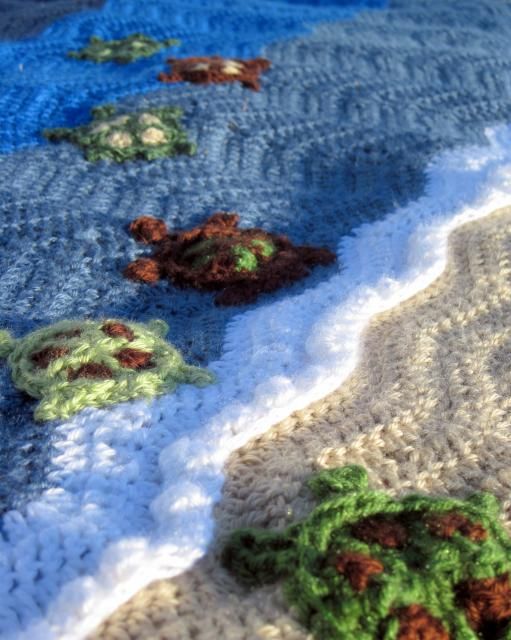
Just the right spot of adorableness.
I went to the site (sewloca.com), where Cristina broke down her process of designing, and then making the afghan. She included a link to a free ripple afghan pattern, and described how she worked the ripples, then added some bobbles in the white to make the "foamy" look. Entranced and encouraged, I decided to try my own luck at making a swimming turtle blanket.
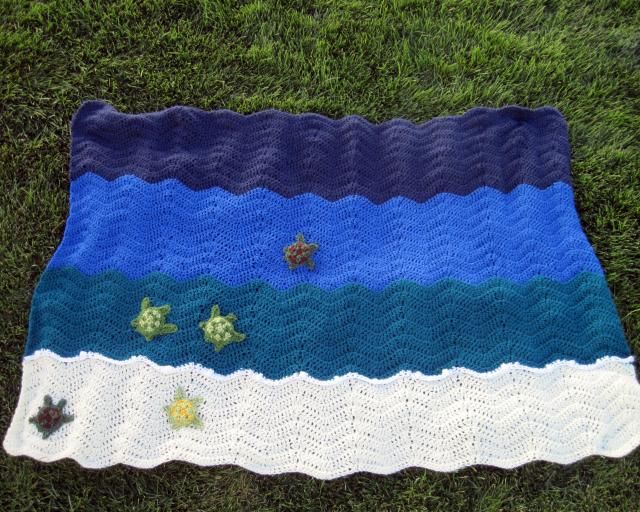
It turned out well. So well in fact, that I decided to make another one, and this time write out the pattern as I went so that I didn't have to rely on other sites for my own future reference. Turtle blanket #1 was sent to the new babe, and I started work on turtle blanket #2.
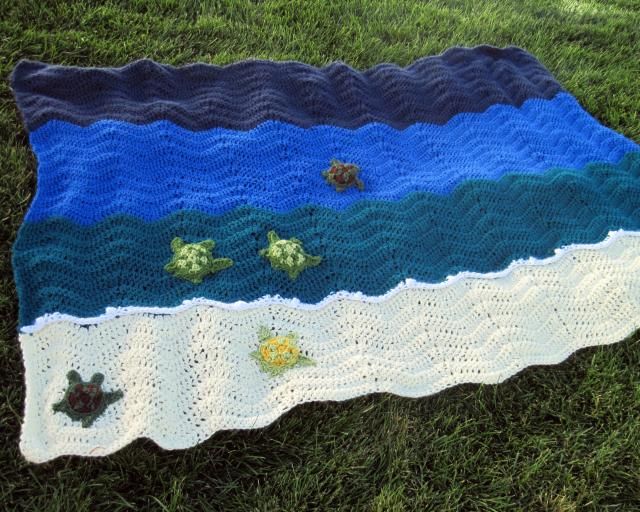
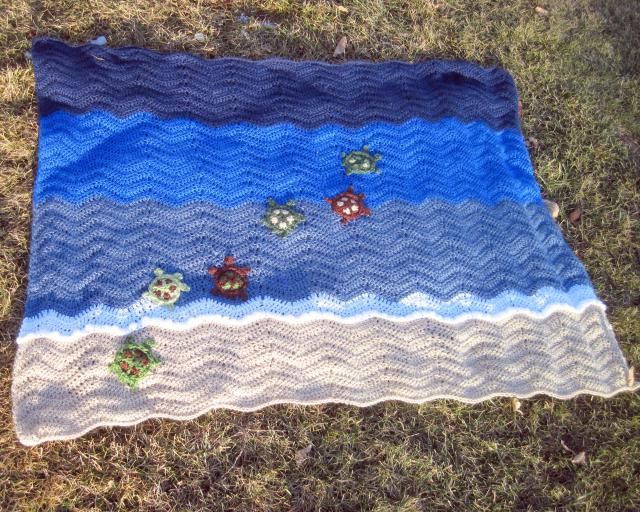
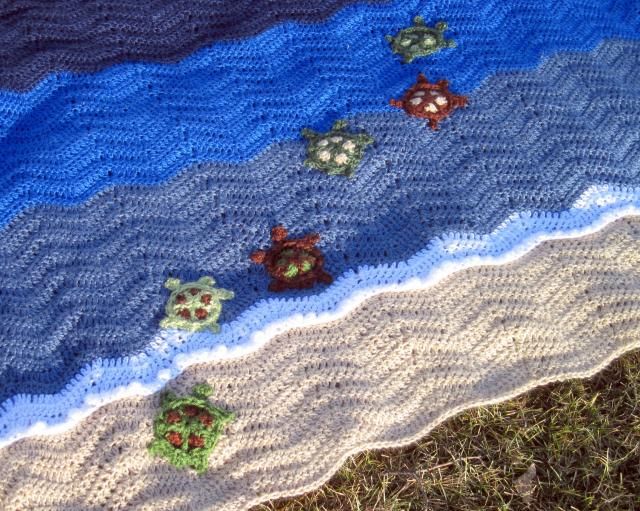
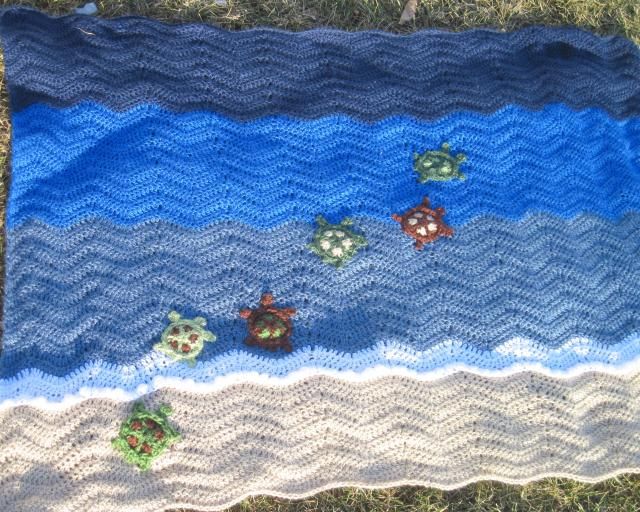
I decided to make the foamy part of the sea a little bit thicker, this time around, and I added an extra turtle.
Also, it was winter by the time I finished this one, so the grass background looks much worse for the wear than in the photos of blanket #1.
After I'd finished making the blanket and writing up the pattern, I decided that just for easy reference, I'd post my version of the pattern here. I do sell a few patterns in my etsy shop, but since I got the idea and the building blocks of this blanket entirely from from the goodness of some other people's hearts, it feels right to keep this pattern here, where anyone who wants to access it can do so for free.
So, here it is:
SWIMMING TURTLES PATTERN
(inspired by Cristina at sewloca.com)
Yarn-5 skeins of worsted weight yarn, one in each of the following colors: Dark Blue, Medium Blue, Light Blue, White, and Tan. Also some yarn in differing shades of green, brown, tan, etc, for the turtles. (I used Caron Simply Soft for all aspects of this project)
Crochet Hook-Size G (This is what works for me. You might want to use a size H hook here, I crochet more loosely than just about anyone I know)
Pattern:
BLANKET
Starting with the darkest blue, chain 171 across
R1: Dc in 4th ch from hook, *dc in next 4 st, dec 2 times, dc in next 4 st, 2 dc in each of next 2 st * repeat from * to * across, ending with 2 dc in last st.
Follow this pattern for 16 rows, then switch to medium blue for 16 rows, then to light blue for 16 rows.
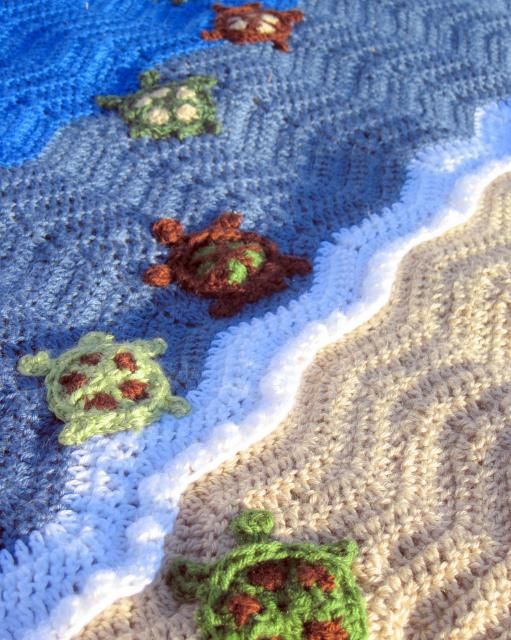
Switch to white, follow pattern for 3 rows. On the 4th row, working in back loops only, make a cluster stitch every other stitch or so (this makes the "foam" of your ocean), switch to tan/creme at end of row.
Using tan/creme, working in free loops of the white row, continue the pattern. Once you get to row 2 of the tan, use both loops, and continue until you have made 16 rows. Fasten off.
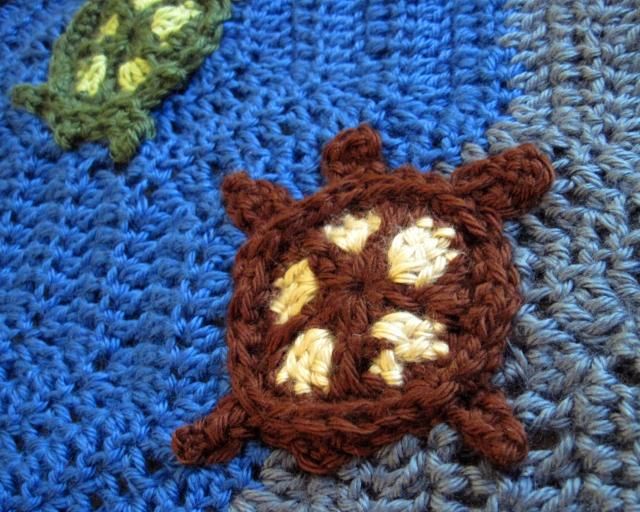
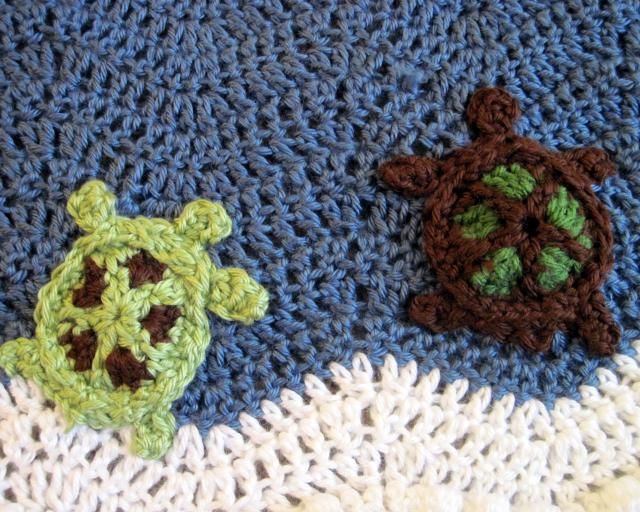
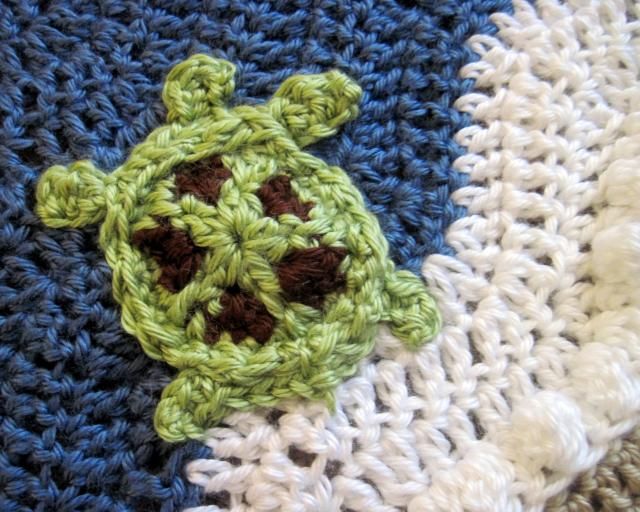
TURTLES
Make 6 (or five, if you prefer)
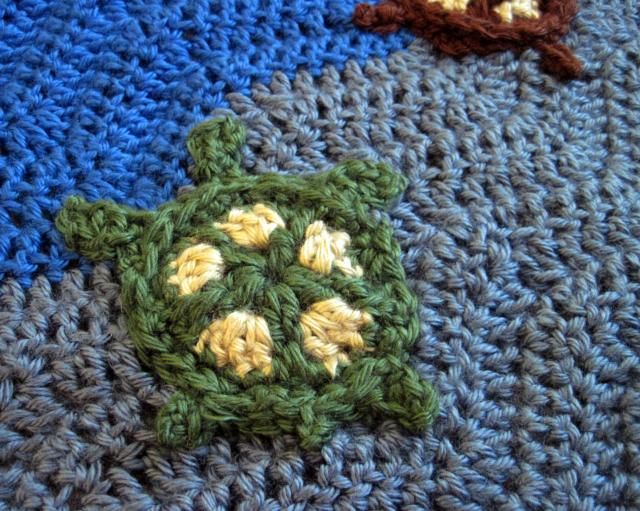
SHELL
RND 1: Starting with Green (or whatever color you want the head and legs and tail to be), chain 3(counts as first hdc), then hdc in beg chain, *ch 2, 2 hdc in beg ch* 4 times. Join, switching to brown You should have five ch 2 spaces.
RND 2: in any ch 2 space, ch 3, 2 dc in same space, *ch 2, 3 dc in next sp*, four times. Join, fasten off.
Rnd 3: With green, ch 2 in middle st of any 3dc cluster, *sc in next st, sc, dc in stitch below, sc in next ch 2 space, sc in each of next three dc* repeat around row, chain 2
Rnd 4: Working in front loops only, sc around, decreasing every five stitches or so. Finish off.
FRONT LEGS AND HEAD
LEG: Using the picture as a guide, and working in the unused back loops of Rnd 3, sl stitch in the stitch where you want the front right leg to be. Ch 5, then turn and, working in back loops, sc, hdc, dc, hdc, sc in next five stitches. sl stitch to Rnd three, and sc to where you want the head to be.
HEAD: sl st where you want the head to be, then chain 4. Working in back loops of ch, hdc four times in next sc, sc in each of next three ch. sl stitch, and sc to where you want the other leg to be. Repeat process for leg, finish off.
BACK LEGS AND TAIL
LEG: Using the picture as a guide, and working in the unused back loops of Rnd 3, sl stitch in the stitch where you want the back left leg to be. Ch 4, sc in back loops of sc, sc in unused loops of rnd 3. until you get to where you want the tail. Make tail by sl st, ch 2, sl st in same stitch. Sc in unused loops of Rnd 3 until you get to where you want the other leg to be, repeat process for leg, finish off.
Weave in ends, stitch turtles to blanket.